
- Signal contacts
- Who appears in the contact list?
- Edit your contact's name
- Set or edit a custom nickname and note
- View a custom note
- Edit your contact's photo
- Edit your contact's number
- Refresh your Signal contact list
- Remove contact
- Alert: Contacts can not be processed
- Block contact
Signal contacts
For contacts saved to your phone's contact list, a contact icon  displays by their name in a one-to-one chat.
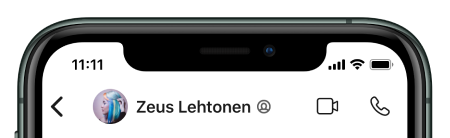 |
Saved Contact
|
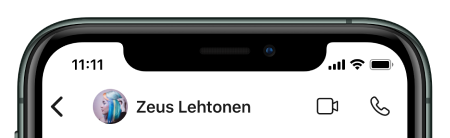 |
Unsaved |
Who appears in the contact list?
- Other Signal users who are saved to your phone's contact list.
- Other Signal users who are not saved to your phone and you share a group with, have previously messaged or have explicitly approved.
- Your Signal PIN recovers these unsaved Signal users when you reinstall.
Edit your contact's name
- Save this person to your phone's contact list to change how you see their name.
- Open your phone's contacts app and edit the contact entry to change the name.
- Save the change.
- This contact icon will appear by your contact's name in a one-to-one chat.
Set or edit a custom nickname and note
Set a custom nickname and note for anyone you're chatting with on Signal, even if they aren't in your system contacts. They are end-to-end encrypted and protected by your Signal PIN so they can be securely restored if you lose your phone too.
- In a 1:1 chat, tap on the chat header to see chat settings.
In a group chat, tap on the person's avatar. - Tap on the
 Nickname field
- Choose to set a first name, last name, or note.
- Tap Done or Save.
- The name and note only appear for you.
View a custom note
If you have set a custom note, you can view the note by going to chat details.
- In a 1:1 chat, tap on the chat header to see chat settings.
In a group chat, tap on the person's avatar. - Tap on the arrow next to a person’s name to see more information about them.
- View the information on the last line next to
 the note icon.
- Tap on the arrow next to Note to view the entire note.
Edit your contact's photo
- Save this person to your phone's contact list and assign an image so you can see it instead of their profile photo.
- For linked iPads, you must edit the photo on the phone's contacts app.
- Enable the setting to view the saved contact info.
- Go to Signal Settings
 > Chats > enable Use address book photos.
- Go to Signal Settings
Edit your contact's number
- Open your phone's contacts app and edit the contact entry.
- Add the + and the country code to your contact's number.
- For numbers from Brazil, the number should start with +55 followed by the city code. For example, +55 21 (mobile number).
- For numbers from Argentina, the number should start with +549 followed by the city code. For example, +549 11 (mobile number).
- For numbers from Côte d'Ivoire, the number should start with +225 followed by the two digit provider code. For example, +225 07 (8-digit mobile number).
- Save the number.
- Then refresh your contact list.
Refresh your Signal contact list
- On your phone, in Signal, tap Compose to view your Signal contact list and pull down on your contact list to refresh.
- On Signal Desktop, go to Signal Settings >
 Preferences... > Chats > Import now.
Remove someone from your Signal contact list
- Remove this contact from your phone's address book.
- Open Signal, tap Compose to view your Signal contact list.
- Long press on their name or click on the three dots next to their name.
- Select Remove.
- Select Remove in the alert or pop-up to confirm.
- After removing, you will no longer see profile updates and you will need to accept a message request if they message you.
Alert: Contacts can not be processed
- Your phone's address book has too many contacts for Signal to process right now.
- Try deleting entries from your phone's contact list.
- Feel free to contact us to share feedback about this experience. Go to Signal Settings > Help > Contact Us > tell us details, include a debug log, and send the email.